Mise à jour de Live
Suivez les étapes de ce guide pour mettre à jour votre installation de Ableton Live. Il est toujours recommandé d'utiliser la dernière mise à jour de votre version de Live. Pour en savoir plus, consultez Configuration système minimale requise pour Live.
Mises à jour automatiques
Mises à jour manuelles
Sélection du bon programme d'installation
Mise à jour de Live 11
Remarque : Si vous avez utilisé Live Beta et souhaitez transférer vos préférences vers une version publique mise à jour de Live, vous pouvez les copier comme expliqué dans ce guide : Utiliser les préférences de la version d'essai ou Beta dans une version officielle.
Mises à jour automatiques
- Ouvrez les Préférences de Live → Licences/Maintenance ou Licences & Mises à jour
- Sous Maintenance → Activer les mises à jour automatiques, sélectionnez Toujours.
Pour plus d'aide, consultez Résolution des problèmes de mises à jour automatiques.
Compatibilité après les mises à jour
Les Sets de Live peuvent être ouverts dans la version de Live dans laquelle ils ont été créés/enregistrés, ainsi que dans toute version ultérieure. Cependant, veuillez noter :
- Une fois Live mis à jour, si vous ouvrez et enregistrez un Set, il ne pourra plus être ouvert dans une version antérieure. Cela s'applique également après une mise à jour (automatique ou manuelle) vers une nouvelle version mineure ou "point". Par exemple, les Sets enregistrés dans Live 12.2 ne peuvent pas être ouverts dans la version 12.1 ou antérieure.
- Après la mise à jour, il vous sera demandé d'enregistrer une nouvelle version du Set afin de préserver la compatibilité. Pour en savoir plus, consultez Compatibilité descendante.
Mises à jour manuelles
Il est parfois nécessaire de mettre à jour Live manuellement. Pour cela, rendez-vous sur votre compte Ableton pour télécharger et installer la version la plus récente. Des instructions détaillées sont disponibles ici :
Pour éviter d'écraser accidentellement un ancien set, Live vous demandera d'enregistrer une nouvelle version à l'aide de l'option "Enregistrer sous...". Veillez à enregistrer cette version sous un nouveau nom :
Mise à jour de Live 11.3 pour Push 3 sur Windows
Pour installer les pilotes Push 3, installez la version actuelle de Live manuellement depuis votre compte Ableton, comme décrit ci-dessous. Si Live 11.3.x est installé via la mise à jour automatique, les pilotes Push 3 peuvent ne pas être installés.
Désinstallation de Live
Il n'est pas nécessaire de désinstaller les versions précédentes de Live avant la mise à jour. Cependant, si vous souhaitez désinstaller Live, vous pouvez suivre ces étapes : Désinstaller Live (Mac) / Désinstaller Live (Windows).
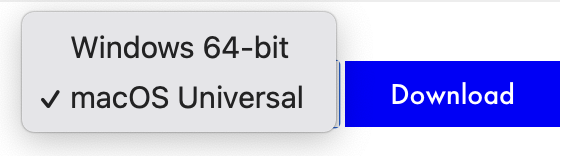
Sélection du bon programme d'installation
Ableton.com détectera automatiquement le programme d'installation approprié pour le système d'exploitation de votre ordinateur. Vous pouvez également sélectionner manuellement différentes versions de Live, si nécessaire. Voici comment choisir le bon package d'installation pour votre système :
macOS Universal
Apple silicon (série M)
Apple Intel sous macOS 10.14 Mojave ou version ultérieure
macOS Intel uniquement

La version Intel de Live 11 ou antérieur est destinée aux Mac équipés de processeurs Intel fonctionnant uniquement sous macOS 10.13 High Sierra.
Remarque : Exécuter Live (Universal) en tant qu'application Intel
- Vous pouvez forcer Live à s'exécuter en tant qu'application Intel via Rosetta 2 sur un Mac équipé d'Apple silicon, comme expliqué dans le guide Comment ouvrir Live avec Rosetta sur macOS. Cependant, cela n'est pas nécessaire si vos plug-ins sont mis à jour pour fonctionner nativement sur Apple Silicon. Veuillez vérifier les dernières informations de compatibilité Apple silicon et macOS fournies par chaque développeur de plug-ins.
Windows
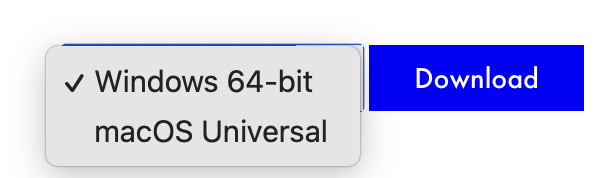
Le package de téléchargement Windows 64 bits est pris en charge pour tous les PC et versions de Windows compatibles. Pour en savoir plus, consultez Compatibilité de Windows avec Live.
Installation de plusieurs versions
Pour installer plusieurs versions de Live, suivez les étapes ici : Installer plusieurs versions de Live.
Mise à jour de Live 11
Une fois Live 11.1.x installé, votre version sera mise à jour automatiquement si les mises à jour automatiques sont activées comme décrit ci-dessus.
Comment mettre à jour depuis Live 11.0.12 ou une version antérieure
Pour mettre à jour depuis Live 11.0.x, vous devez installer la version actuelle manuellement via Ableton.com. Si votre version installée est Live 11.0.12 ou antérieure, Live 11.1 ou version ultérieure ne se mettra pas à jour automatiquement, même si les mises à jour automatiques sont activées dans les Préférences de Live. Connectez-vous à votre compte Ableton pour obtenir le lien de téléchargement et installer la version actuelle de Live.
Plus d'informations sur l'installation de Live sont disponibles dans ces articles :